We were assigned to make a dedication page for the cookbook, and then we would pick a final one. To make my dedication page, I started with the lettering. I went in paint and typed out the words. I colored them black and moved the text into Photoshop. In publisher I painted white lines inside of the
lettering so they weren’t plain black. I filtered the text two different times. For the background, I used paint. I started by making a bunch of white boxes scattered across the page. I took the paint bucket tool and started filling in the squares with different colors. I moved the background into Photoshop and I
filtered it twice.
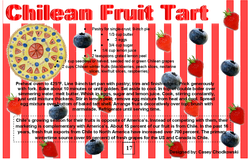
I was assigned Chile as my country. I found the Chilean Fruit Tart off of Google. I made the text by typing out it in paint, and coloring in the text with a reddish color. I used the line tool to make the lighter lines in the letters. I moved the text to Photoshop and filtered it. I drew the Chilean Fruit Tart which is in the top left corner, and I scanned it onto the computer and brightened it. I lightened and darkened the blueberries and the strawberries in order to see the text. I used the box tool on Publisher to make the lines in the background and I lightened them. The box in the center I made with the box tool.
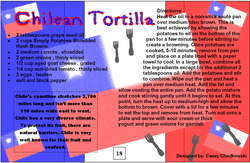
This is the backside of the Chilean Fruit Tart. I made the flag in paint. I made boxes and with the fill tool I filled them with color. Then I drew the star in paint. I moved the flag into Photoshop and filtered it twice. I made the forks in paint too. I made multiple flags by copy pasting and then resizing them. I made boxes in the back to match with the flag color. I lightened the flags so you could read the text over them. I scattered the forks and flags throughout the paper to fill empty space. The box in the center I made with the box tool.
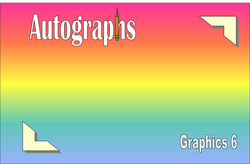
For the text I used word art. For the background I filled a rectangle in with a rainbow colors. Then I used clip art to find the two border triangles. I used a pencil from clip art and set it on the ‘h’ in Autographs.

This was done for extra credit. I used multiple sheets to make this and I glued them together. The text was made from word art and the football was from clip art. The raider logo was found in the g drive.
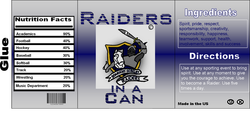
I made a can label. The first thing I did was measure the dimensions of the can and made a new page with those dimensions. I added a half inch on the end so I would have room to glue it down. I also sectioned the paper up into three sections making the middle a little larger than the two ends. I did Raiders in a can. I made the background my school colors. I used the school logo and put it into paint. I used the paint tool to color in the logo so it was different then I moved it to Photoshop and filtered it. For the text I colored in the letters with blue. I used the line tool to make white lines in the letters. I situated them in a way so the text and the image would fit in the middle. On the left I put nutrition facts. I used the line tool to section them up. I put a bar code that I found from Google below it. All the way to the left I put ingredients and directions. I made two symbols to put at the bottom. I made crop marks by going to advanced printer settings.
We were assigned to make an animation using GIF animator and paint. I decided I was going to do the snowfall and then eyes blinking in the snow. I started by drawing a scene of clouds and the ground, and this was going to be the basis of my animation. I saved that as GIF and did all my other slides based off the first slide. For each slide, I added more and more snow falling from the clouds until they reached the ground. I then used the spray paint tool to make it look like the snow was piling up on the ground. I saved all those slides and then made two straight lines to make it look like eyes blinking. I used the circle tools to make eyes and then I made then move from side to side. I used GIF and placed all my slides in GIF animator. I put the duration of time for each slide and then went back and made the duration for the eye slides longer. I saved as a GIF animator and hit play.

For out final project we had to tie dye. I stuck my shorts into soda ash and then rang the shorts out. I put them in a tray that was raised so the dye would drain to the bottom. I scrounged my shorts vertically, so there would be a design. I used the tie dye colors and put them onto my shorts in no pattern. I did the same exact thing to the other side. We let the tie dye sit for a day. The next day, I washed my shorts out with water in order to wash off the extra color. We hung all of the colors up on the clothes lines outside. Two days later, we put the dry tie dye in the washing machine with vinegar. After we washed them, we put them in the dryer for about 30 minutes, so we could take them home that day. I learned that colors will run if they get left out in the rain, and the colors will blend together and make different colors.
This project was using the program Pivot. For each frame, I moved the stick figure until it got to the middle. Then in the middle, I had the stick figure unfold by moving the arms and legs. I had the stick figure walk off the page and wave. When you make frames, a shadow appears so you know where your last frame was and it is easier to work with. You can change the speed, color, and different figures in Pivot too.
