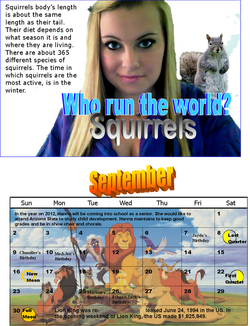
The top of this sheet is the April picture. The theme for this one was to have Hanna with a squirrel. For Hanna's picture, I just darkened her face and I erased the background behind her. The squirrel I edited it on to her shoulder with Photoshop. I erased the background on the squirrel and morphed it onto Hanna’s shoulder. I realized that when I morphed the squirrel on Hanna’s shoulder, it didn’t sit on her shoulder right. To fix this, I just morphed more fur on the bottom of the squirrel so that it lined up with Hanna’s outline on her sweatshirt. To write “Who run the world?” I used word art. I put two of that quote and out the darker one behind the lighter word art so that it looked like the words had depth. The word squirrels were created with word art too. Then, the paragraph is just facts on squirrels.
For the bottom of this sheet, I used a scene from the lion king. I lighted the picture so that it would look faded in the background. For the calendar, I made it transparent in order to see the picture in the background. I used word art to make the word September. To make the moons, I just copy pasted from my previous calendar sheets. The numbers I bolded and put in Arial Black so they would stand out more. For the words in the calendar, I used what Hanna does in September and the bottom was some facts about the Lion King movie. I took the grid of this month from a publication that our class made with all of the month’s calendars.
For the bottom of this sheet, I used a scene from the lion king. I lighted the picture so that it would look faded in the background. For the calendar, I made it transparent in order to see the picture in the background. I used word art to make the word September. To make the moons, I just copy pasted from my previous calendar sheets. The numbers I bolded and put in Arial Black so they would stand out more. For the words in the calendar, I used what Hanna does in September and the bottom was some facts about the Lion King movie. I took the grid of this month from a publication that our class made with all of the month’s calendars.
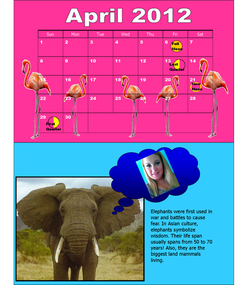
For the April calendar I did flamingos because my picture on top is flamingos too. I used a picture of a flamingo then made it transparent. To match the flamingos I used a pink background. Then, I made the words and the numbers white because it matched with the pink. I lined up 5 flamingos on the bottom of the page in different directions and made them different sizes. I also set the background of the calendar transparent. I took the grid of this month from a publication that our class made with all of the month’s calendars.To make the moons, I just copy pasted from my previous calendar sheets.
The bottom picture is the picture for October. I decided to do an elephant thinking of Hanna. I made the elephant very light and then I put a dark frame around it so it stood out more. Hanna’s picture I made a little brighter. Then I used auto shapes in Publisher to make the thinking cloud, and then I filled it with dark blue because Hanna’s shirt was light blue. I matched the background of the whole image light blue to contrast with the dark blue. The paragraph on the side is just elephant facts.
The bottom picture is the picture for October. I decided to do an elephant thinking of Hanna. I made the elephant very light and then I put a dark frame around it so it stood out more. Hanna’s picture I made a little brighter. Then I used auto shapes in Publisher to make the thinking cloud, and then I filled it with dark blue because Hanna’s shirt was light blue. I matched the background of the whole image light blue to contrast with the dark blue. The paragraph on the side is just elephant facts.
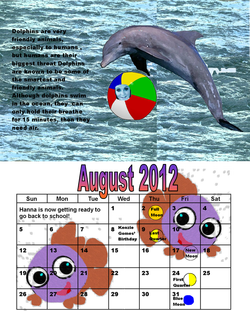
I made the dolphin by erasing the background. I then filtered it in Photoshop. For the ball, I used pain and I colored the ball. I moved the picture to Photoshop and morphed Hanna’s face into the center of the ball. For the background, I used a picture of water; I filtered it into Photoshop. In order to not make the background with pixels, I tiled the background with the water. The text was used by putting a textbox and I chose back so you can see the text on the water.
For the August calendar, I used a fish for the background. I colored the fish in paint. Then I filtered the fish in Photoshop. I put the fish in the Publication, and made a copy of it and flipped it over, so there was two fish. I made the background of the fish transparent. The words August 2012 was made by word art. The color faded from purple to a peach color. The moons were just inserted into the calendar because I made them for previous calendars. I took the grid of this month from a publication that our class made with all of the month’s calendars. To make the moons, I just copy pasted from my previous calendar sheets.
For the August calendar, I used a fish for the background. I colored the fish in paint. Then I filtered the fish in Photoshop. I put the fish in the Publication, and made a copy of it and flipped it over, so there was two fish. I made the background of the fish transparent. The words August 2012 was made by word art. The color faded from purple to a peach color. The moons were just inserted into the calendar because I made them for previous calendars. I took the grid of this month from a publication that our class made with all of the month’s calendars. To make the moons, I just copy pasted from my previous calendar sheets.
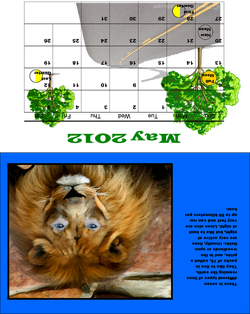
This page was flipped in order for it to fit correctly with the rest of the calendar. I wanted to make a road with trees on the side. I took the picture of a tree off of Google, and then I filtered it in Photoshop. Then I moved the picture into the publication and copy pasted it so there were two trees. I made the second tree smaller so that it looked like it was in the distance. Then I took a picture of the road with scenery and put it into paint. I erased the background in paint, so that it was only the windy road. Then I put the road into the publication. I placed the trees next to the road so it looked like there was depth to the picture. I took the grid of this month from a publication that our class made with all of the month’s calendars. To make the moons, I just copy pasted from my previous calendar sheets.
For this picture, I took a picture of a lion’s face off of Google. I moved the picture into Photoshop. I also added a picture of Hanna into Photoshop. I scaled the picture of Hanna’s face so that the eyes looked proportional when I morphed them onto the lion’s face. I used to cloning tool to clone Hanna’s eyes onto the lions face. Then I smudged the skin and the lions fur so it looked like the eyes were supposed to be there. Then keeping it in Photoshop, I filtered the picture. Then I added a black border around the lion to make it look like a picture frame. I put a blue background so it matched with the eyes.
For this picture, I took a picture of a lion’s face off of Google. I moved the picture into Photoshop. I also added a picture of Hanna into Photoshop. I scaled the picture of Hanna’s face so that the eyes looked proportional when I morphed them onto the lion’s face. I used to cloning tool to clone Hanna’s eyes onto the lions face. Then I smudged the skin and the lions fur so it looked like the eyes were supposed to be there. Then keeping it in Photoshop, I filtered the picture. Then I added a black border around the lion to make it look like a picture frame. I put a blue background so it matched with the eyes.
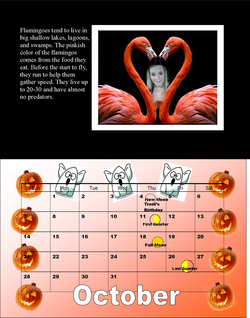
For this picture, I used a picture of two flamingoes making a heart from Google. I put that into Photoshop along with a picture of Hanna. In order to morph Hanna’s face into the flamingos’ heart I had to scale it to make it fit. This meant that I had to downsize the picture of Hanna. I used the cloning tool to clone Hanna’s face between the flamingoes. Then I blended Hanna’s skin with the flamingoes so it looked as if they were attached. After I did that, I filtered the picture. I moved it to the publication and gave it a black background. I also put a white border around the picture to make it look like it was in a picture frame. The text was facts about flamigoes.
For this calander, I used the theme of Halloween. I got a picture of a ghost and a picture of a pumpkin. I filtered each one seperatly in Photoshop. Then I added both the pictures into the publication. I made them smaller, and copy pasted the pictures so I had multiple ones. I used three ghosts for the top of the calendar, and put them at different angles. I used four pumpkins for each of the sides of the calendar, and I put them in different directions too. To match with the ghost and pumpking I put a white and orange background. I made a box and I filled it with orange and white, and picked the option that let me make them fade into eachother. The word October was made by word art. I took the grid of this month from a publication that our class made with all of the month’s calendars.To make the moons, I just copy pasted from my previous calendar sheets.
For this calander, I used the theme of Halloween. I got a picture of a ghost and a picture of a pumpkin. I filtered each one seperatly in Photoshop. Then I added both the pictures into the publication. I made them smaller, and copy pasted the pictures so I had multiple ones. I used three ghosts for the top of the calendar, and put them at different angles. I used four pumpkins for each of the sides of the calendar, and I put them in different directions too. To match with the ghost and pumpking I put a white and orange background. I made a box and I filled it with orange and white, and picked the option that let me make them fade into eachother. The word October was made by word art. I took the grid of this month from a publication that our class made with all of the month’s calendars.To make the moons, I just copy pasted from my previous calendar sheets.
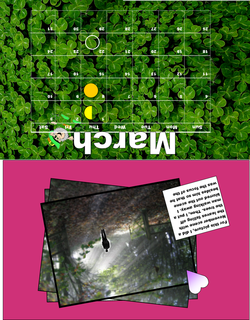
This page was flipped in order for it to fit correctly with the rest of the calendar.I picked a patch of clovers from Google. I filtered them in Photoshop. I transferred them to the publication. I used the tool to make the clovers darker. Then I patched the clovers so that the picture wouldn’t have any pixels. Then I took a picture of a leprechaun and filtered it in Photoshop. After that, I put the leprechaun in the publication and made it brighter. Since the clovers in the background were darker, I made my calendar outlines white so they would be easier to read. Then I used word art to make the word March, and I made it white to match with the calendar. I took the grid of this month from a publication that our class made with all of the month’s calendars.
I took a picture off of Google, of scenery of the woods. I also got a separate picture of a person walking away on Google. I put both of these pictures into Photoshop. I scaled the person walking away to the woods picture. I made the person walking away small so that it looked like it was in the distance. I cloned the person walking into the picture of the woods. Then I blurred everything besides the person so that the person was what stood out in this picture. I moved the picture into the publication, and put a frame around it. Then I made multiple copies of the picture and placed them one behind the other in different directions so it looked like there was a pile of pictures. I put the background pink so that there would be some color.
I took a picture off of Google, of scenery of the woods. I also got a separate picture of a person walking away on Google. I put both of these pictures into Photoshop. I scaled the person walking away to the woods picture. I made the person walking away small so that it looked like it was in the distance. I cloned the person walking into the picture of the woods. Then I blurred everything besides the person so that the person was what stood out in this picture. I moved the picture into the publication, and put a frame around it. Then I made multiple copies of the picture and placed them one behind the other in different directions so it looked like there was a pile of pictures. I put the background pink so that there would be some color.
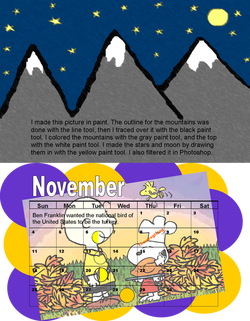
To make this picture, I used paint. I drew the outlines of the mountains in the black ink. Then I made an outline of the white at the top of the mountains for the snow. Then I colored the mountains in white gray. I colored the background a dark blue. Then I made the stars by drawing them with yellow paint. I also did that with the moon. Then I put the picture in Photoshop and filtered it.
For this, I took a picture of Charlie Brown and Snoopy on Thanksgiving Day from Google. I placed the picture in Photoshop and filtered it with poster edges, and then I filtered it again. I put the picture into the publication and realized there was too much white space behind the picture. To fill the space, I used purple and yellow circles that I made in the publication. I made them by using the circle tool and coloring them in. I overlapped the circles and put them behind the main picture. The word November was made by word art.I took the grid of this month from a publication that our class made with all of the month’s calendars. To make the moons, I just copy pasted from my previous calendar sheets.
For this, I took a picture of Charlie Brown and Snoopy on Thanksgiving Day from Google. I placed the picture in Photoshop and filtered it with poster edges, and then I filtered it again. I put the picture into the publication and realized there was too much white space behind the picture. To fill the space, I used purple and yellow circles that I made in the publication. I made them by using the circle tool and coloring them in. I overlapped the circles and put them behind the main picture. The word November was made by word art.I took the grid of this month from a publication that our class made with all of the month’s calendars. To make the moons, I just copy pasted from my previous calendar sheets.
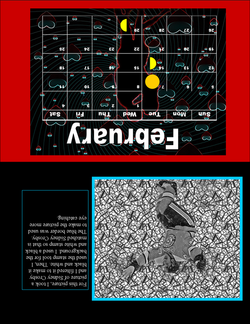
This page was flipped in order for it to fit correctly with the rest of the calendar.I got this picture of the hearts from Google. I also got the picture of the couple from Google. I colored the couple all black in paint and I also erased the background with the eraser tool in paint too. Then I put both pictures into Photoshop. I sized the couple so they would be at the front of the picture, and look big. Then I cloned the couple onto the background. Next, I filtered the picture in Photoshop. Then I put it in the publication and added a red background because the picture didn’t take up all the space. I made the word February with word art. I took the grid of this month from a publication that our class made with all of the month’s calendars.
I took the picture of Sidney Crosby off of Google. I put it into Photoshop and filtered it. Then I put the picture into grey scale. Using the stamp tool in Photoshop, I stamped a design all around Sidney Crosby, covering the background that used to be in the picture. Next, I filtered again to finalize it. I moved the picture into the publication. I put a blue border around the text and picture so the whole picture had some color to it. I also used a black background to match the picture of Sidney Crosby.
I took the picture of Sidney Crosby off of Google. I put it into Photoshop and filtered it. Then I put the picture into grey scale. Using the stamp tool in Photoshop, I stamped a design all around Sidney Crosby, covering the background that used to be in the picture. Next, I filtered again to finalize it. I moved the picture into the publication. I put a blue border around the text and picture so the whole picture had some color to it. I also used a black background to match the picture of Sidney Crosby.
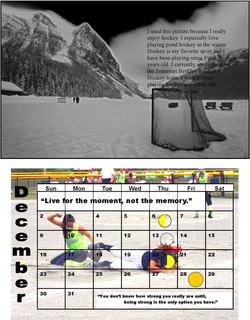
This picture of hockey scenery I found on Google. I put it into Photoshop and made it into a grey scale. Then, I filtered it in Photoshop. I realized that not much of a difference took place, so I decided to filter it again. The sky darkened and looked to have more paint look to it. The outline of the mountains glowed. When I moved the picture into publication, I brightened it. I added the text by just adding a text box.
This picture was taken at my softball tournament by my friend’s mom. I put the picture into Photoshop and filtered it. Not much change took place, so I brightened the picture and filtered it again. I put the picture into the publication and realized it didn’t need a color background because it too up enough space.I took the grid of this month from a publication that our class made with all of the month’s calendars.I found two quotes on Google, and I added them to the calendar, to take up the empty space. I made the word December by using word art.To make the moons, I just copy pasted from my previous calendar sheets.
This picture was taken at my softball tournament by my friend’s mom. I put the picture into Photoshop and filtered it. Not much change took place, so I brightened the picture and filtered it again. I put the picture into the publication and realized it didn’t need a color background because it too up enough space.I took the grid of this month from a publication that our class made with all of the month’s calendars.I found two quotes on Google, and I added them to the calendar, to take up the empty space. I made the word December by using word art.To make the moons, I just copy pasted from my previous calendar sheets.
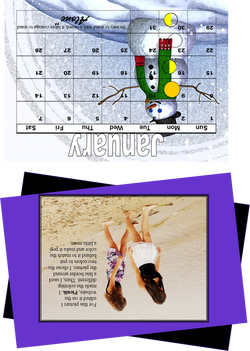
I took the picture of the snowman in the winter time from Google. I used this picture because January is in the winter, and we also get a lot of snow. I moved the picture into Photoshop and filtered it. I ended up filtering the picture three times before it looked different. I liked how the lines above the snowman made it look like it was in a snow globe. I took the grid of this month from a publication that our class made with all of the month’s calendars. To make the moons, I just copy pasted from my previous calendar sheets. I took the quote in the bottom of the calendar from Google. I added it by using a text box.
Since this picture was taken by my brother, I didn’t have to do much editing because I didn’t need to try to avoid copy right. I used the website picnik.com to edit this picture. I changed the coloring of the picture and made it more of a tan color. I also used a sharpen tool to made the lines of our hair and dresses to be more defined. Then I moved it to Photoshop and filtered it. I added the text with a text box. I moved the picture into the publication and put a frame around it. I colored to rectangles, one purple and one black, and put them in different directions behind the picture.
Since this picture was taken by my brother, I didn’t have to do much editing because I didn’t need to try to avoid copy right. I used the website picnik.com to edit this picture. I changed the coloring of the picture and made it more of a tan color. I also used a sharpen tool to made the lines of our hair and dresses to be more defined. Then I moved it to Photoshop and filtered it. I added the text with a text box. I moved the picture into the publication and put a frame around it. I colored to rectangles, one purple and one black, and put them in different directions behind the picture.
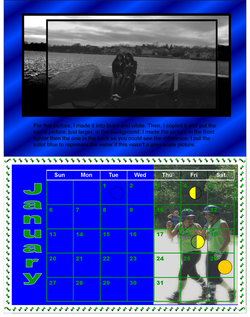
This picture was taken by my friend, so again I did not have to try to avoid copyright. I moved the picture into Photoshop, and made the picture into a grey scale. Then I moved the picture into the publication. I copy pasted the picture, so that I now had two of the same picture. I put black borders around each picture. I brightened one picture and darkened the other. I put the darker picture in back of the lighter one. I also added a blue and light blue background.
I started off by getting the green border and thought I would match my picture and background to it. I used a picture of my friend and me playing softball that my mom took. I filtered it twice, making the picture brighter. When I put it into the publication, I cropped the picture so there was less scenery and just my friend and me. I set the picture off to the right and added a blue background to match the blue in the jerseys. The green in the jerseys matched with the uniforms. I made the word January with word art, but gave it a white outline. I made the lines on the calendar green so that it matched.To make the moons, I just copy pasted from my previous calendar sheets. I took the grid of this month from a publication that our class made with all of the month’s calendars.
I started off by getting the green border and thought I would match my picture and background to it. I used a picture of my friend and me playing softball that my mom took. I filtered it twice, making the picture brighter. When I put it into the publication, I cropped the picture so there was less scenery and just my friend and me. I set the picture off to the right and added a blue background to match the blue in the jerseys. The green in the jerseys matched with the uniforms. I made the word January with word art, but gave it a white outline. I made the lines on the calendar green so that it matched.To make the moons, I just copy pasted from my previous calendar sheets. I took the grid of this month from a publication that our class made with all of the month’s calendars.
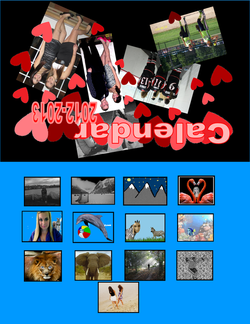
This pictures formed together to make the calendar cover. I took a bunch of pictures that had been taken by me or my mom. I put each picture into the publication and re sized them because they were way to big. After I cropped every picture, I arranged them together so it looked like a collage. I made the text from word art. Then I took a picture of a heart off of Google. I put the heart in pant and colored it. Then I lightened and darkened it too get all the different shades of pink/red. I scattered the hearts in various sizes and colors around the pictures, filling in space that was empty. I used a black background by color filling a rectangle in.
This is the back cover of the calendar. For this, we had to take the pictures we used above every grid. I followed each month by the packet we made before we started this project. I copy pasted each picture into this. I re sized each picture so they were basically the same size, and small. I put a black border around each one of them. Then I arranged them evenly with each other so they weren't scattered about.
This is the back cover of the calendar. For this, we had to take the pictures we used above every grid. I followed each month by the packet we made before we started this project. I copy pasted each picture into this. I re sized each picture so they were basically the same size, and small. I put a black border around each one of them. Then I arranged them evenly with each other so they weren't scattered about.
Finished Cd Cover
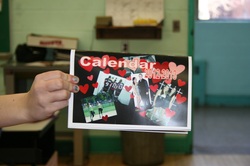
Photo credits to Mr. Adams
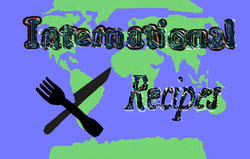
This project we were assigned to make a cookbook cover for our class cookbook. This is supposed to be all original. The first thing I made was the flattened globe in the background. I took a picture from Google of the outlines of the country. I put the picture into paint and colored each continent and then the water. I moved the picture into Photoshop and filtered it. Next thing I made was the text. I wrote "International" in paint with just black coloring. Then, I moved the text into Photoshop and made some lines of colors, with the paint tool, in each letter. I filtered the text two times. I repeated this process for the word Recipes too. I made the fork and knife in paint by drawing them in paint. I lightened the knife so you could tell the difference between the fork and knife when I put them on top of each other.
